Build Log: VPN Tunneling and SSH Setup
This lab will cover spinning up a new virtual machine, creating a dashboard to view all traffic metrics and hacking attempts, installing a firewall on that management server, and finally installing a logging system on the VM to track all of our data.
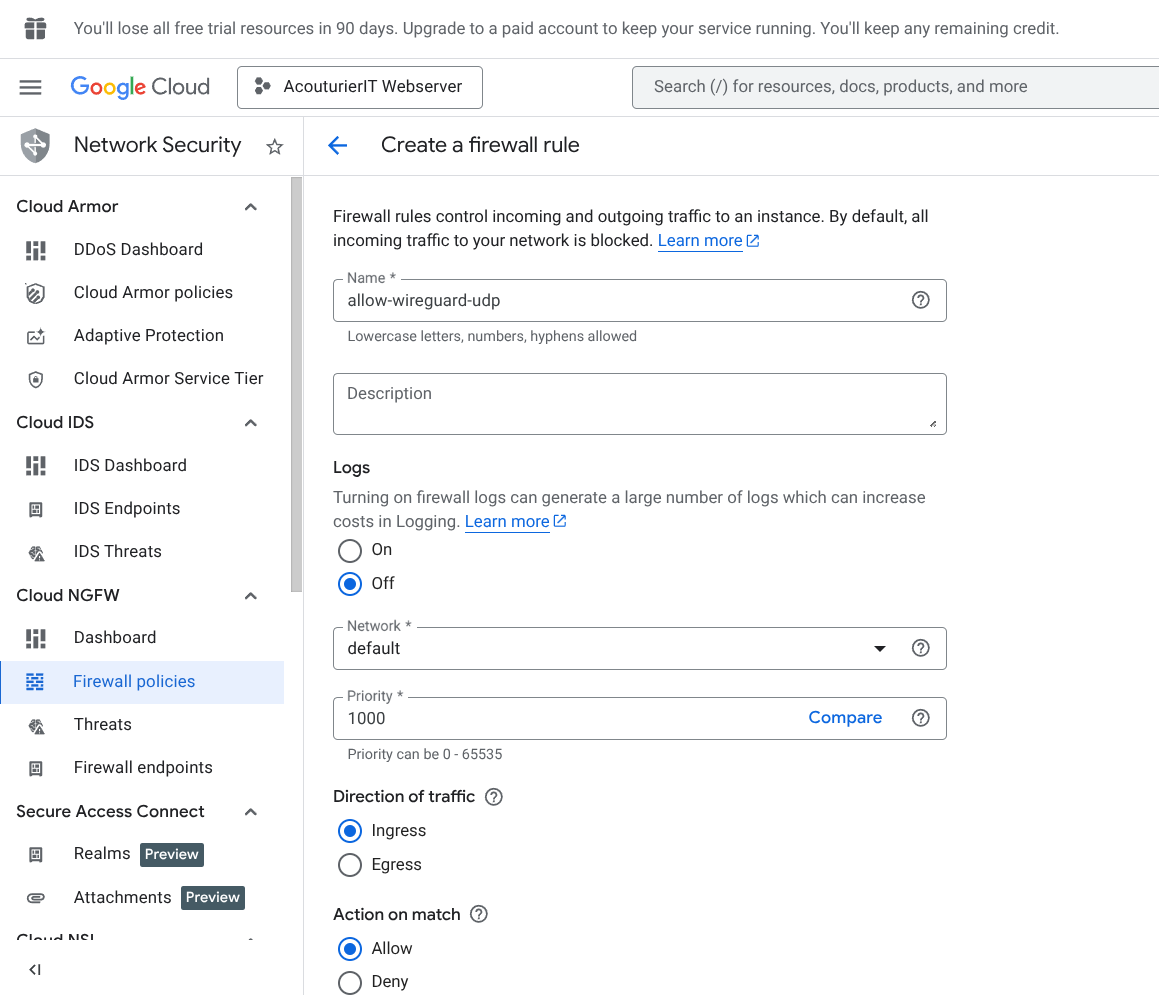
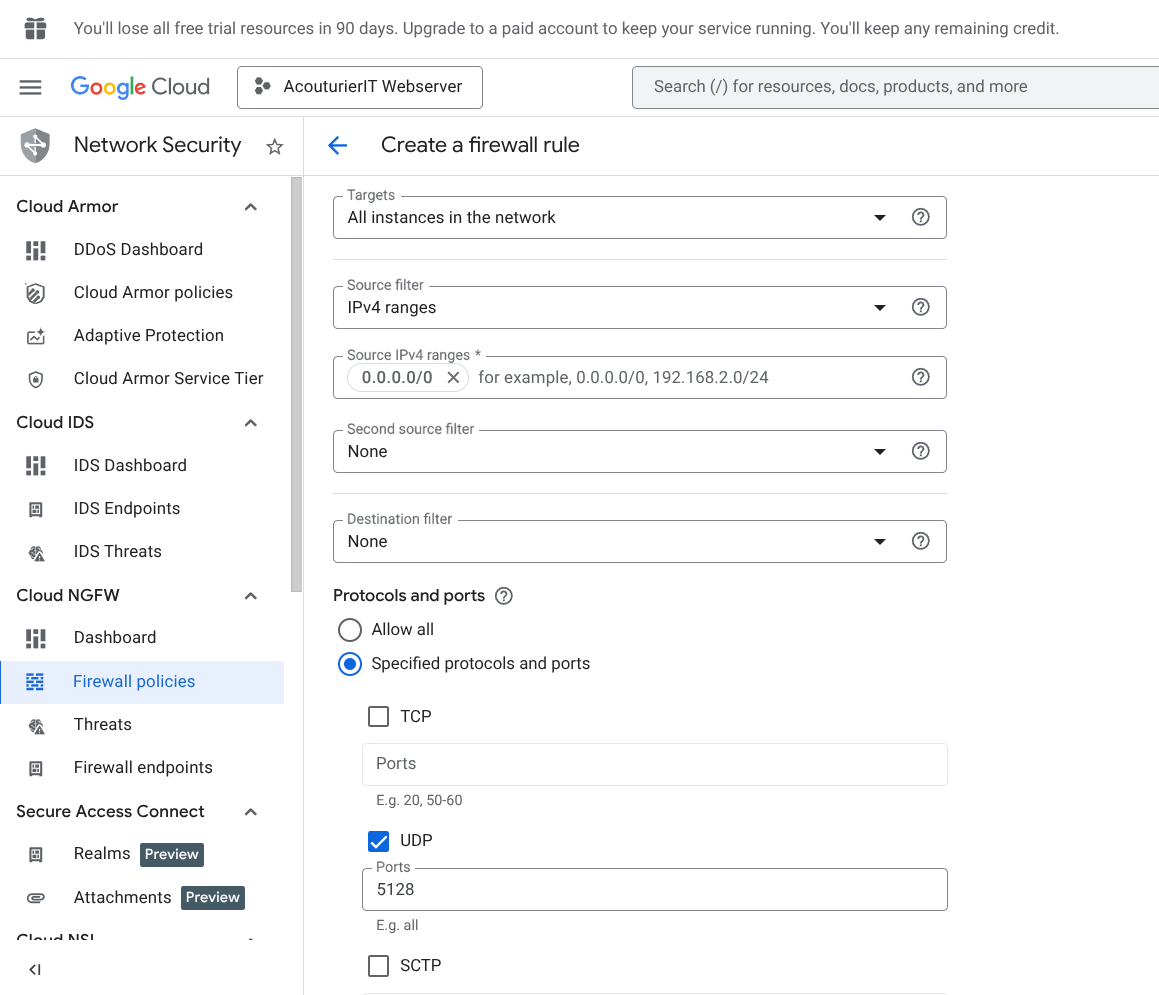
1. Cloud Firewall Configuration
Before installing software we need to tell Google Cloud to let our VPN traffic through. To this end we visit our Cloud console and create a new firewall rule with the below settings.
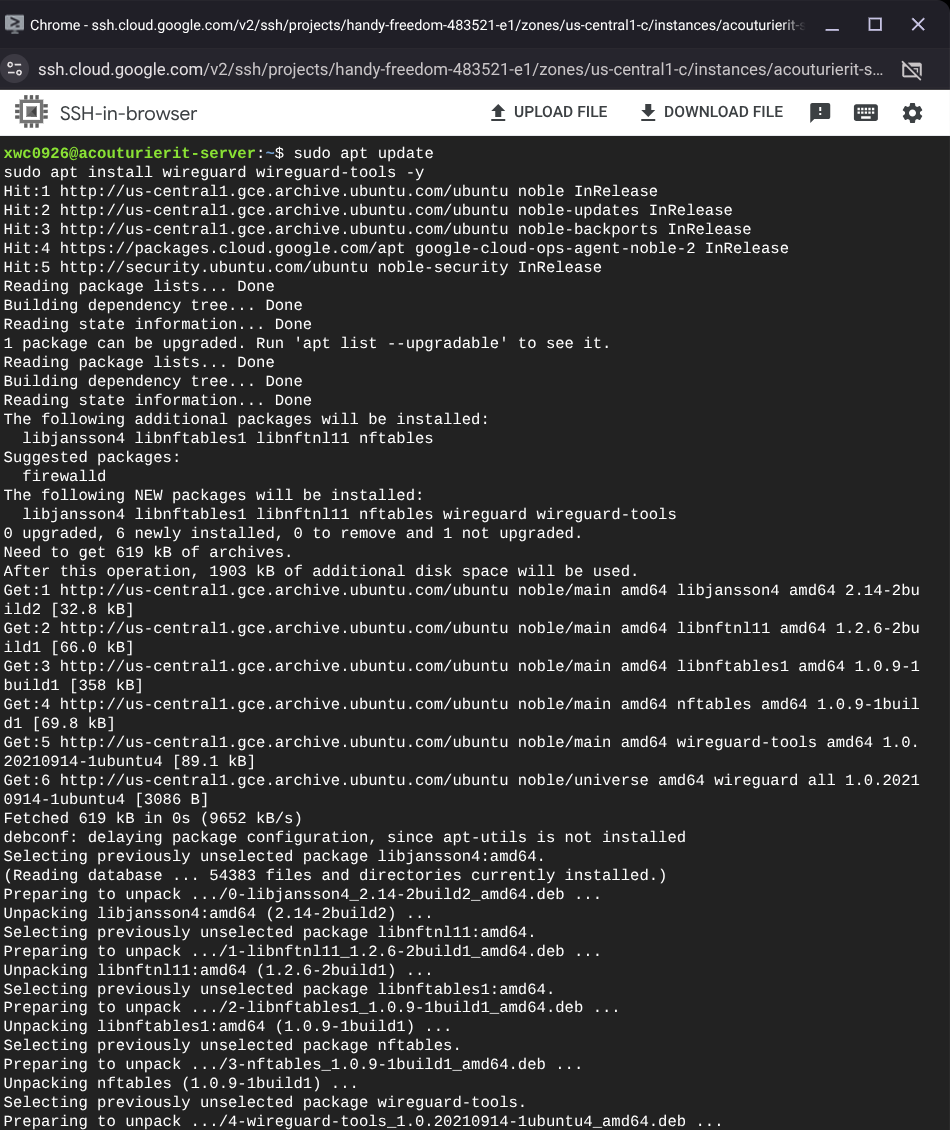
2. Server-Side VPN Installation
Next I will install our VPN on our server using the SSH terminal, and set initial permissions to allows us to connect via SSH and our VPN.
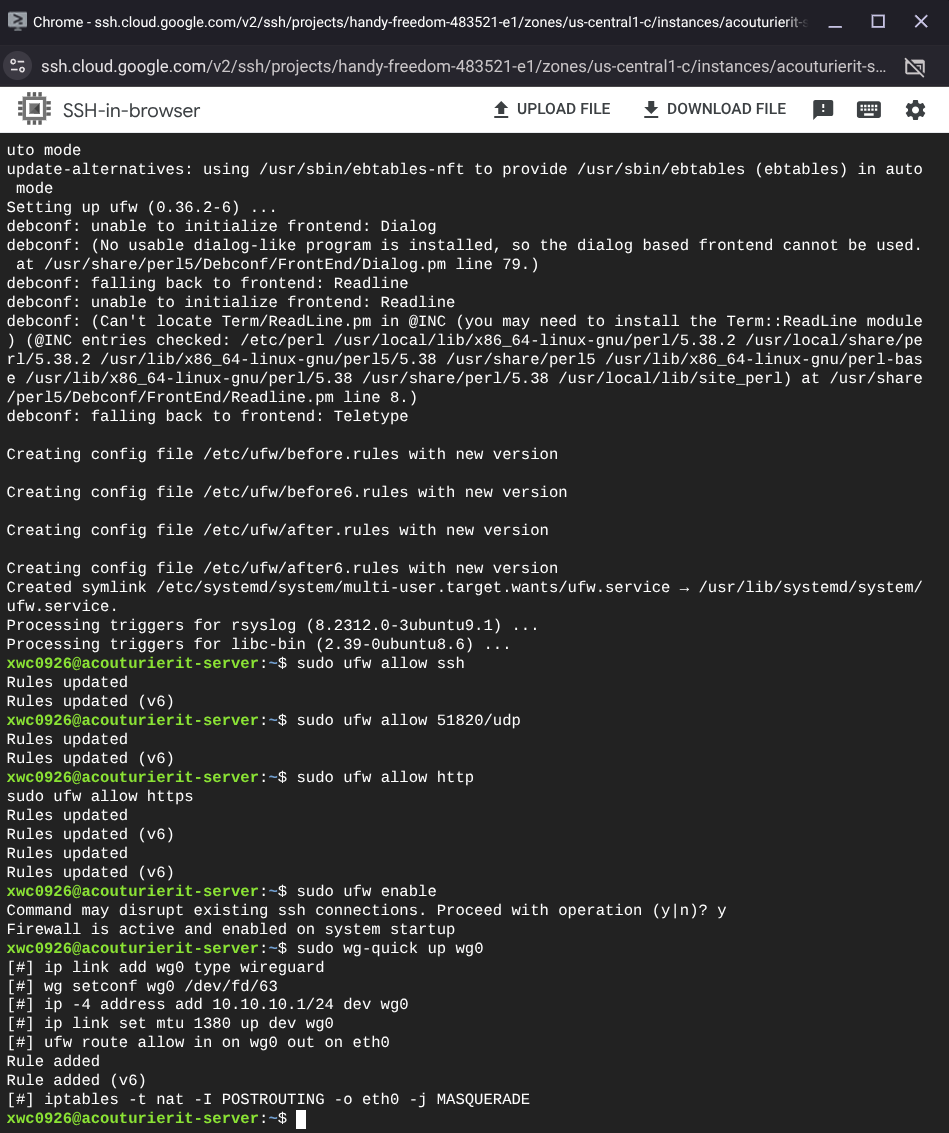
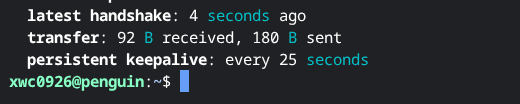
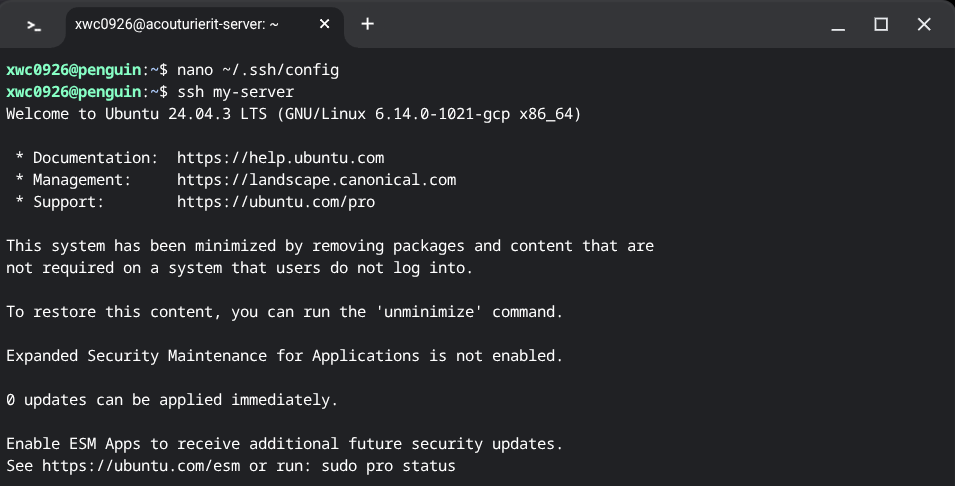
3. Connection Verification & SSH Tunneling
After correctly creating and setting a pair of public and private keys, and configuring the VPN and the server to recognize them, we're able to SSH into our server through our firewall inside our vpn.
We can see below our handshake was successful and we're able to use a personal computer to route into the shell to do our normal work. This allows me to more easily access it without having to login to google and navigate specifically to this VM to manage my webserver.
Technical Conclusion
This implementation successfully hardened the server access points. By restricting SSH access strictly to the VPN tunnel, we have significantly reduced the attack surface, ensuring that management ports are no longer exposed to the open internet.